Google Tag Manager (PA SDK Template)
About Google Tag Manager
Tag Manager, part of Google marketing Platform and closely integrated with Google Cloud, allows you to easily setup tags, their triggers and variables from many solutions, both Google and non-Google, without coding.
Learn more at https://support.google.com/tagmanager.
PA Connect Google Tag Manager
The PA Connect Google Tag Manager provides a plugin using our latest PA SDK tagging methods, in GTM's Custom Template Library.
This plugin allows Piano Analytics tags to be triggered through GTM on the events generated on your site.
Native connector: Simply import the Piano Analytics plugin from Tag Manager's tag addition.
A central place to trigger all tags: Using a Tag Management System allows you to coordinate all tags fired by your site from one place. You can also rely on the same variable for various solutions.
Collaboration: Work with your team on the tag's variables and their use, tags, triggers and variables can easily be edited by everyone in your team.
Import templates
Tag Templates
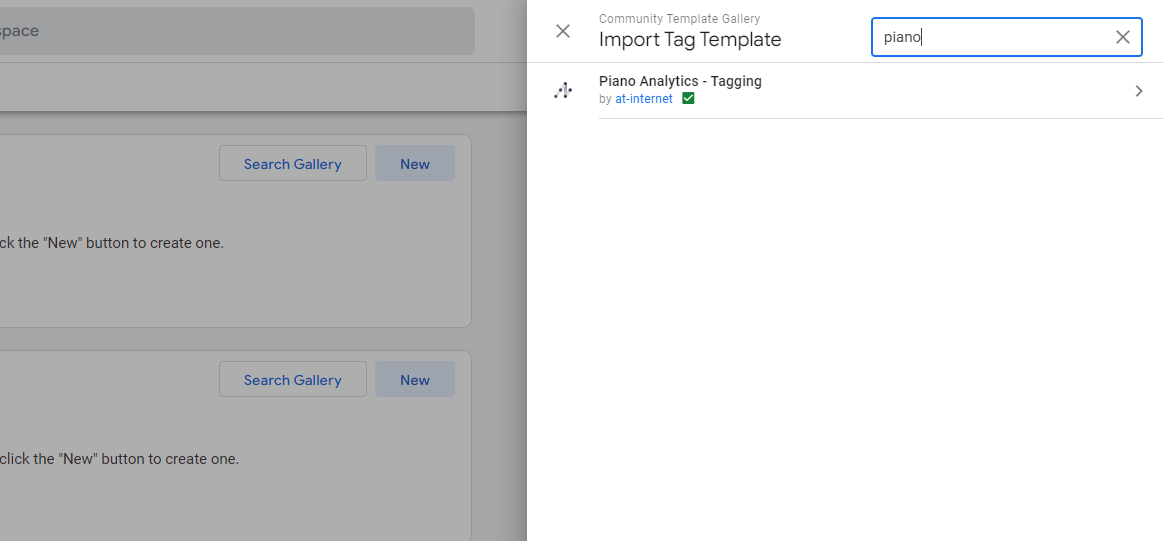
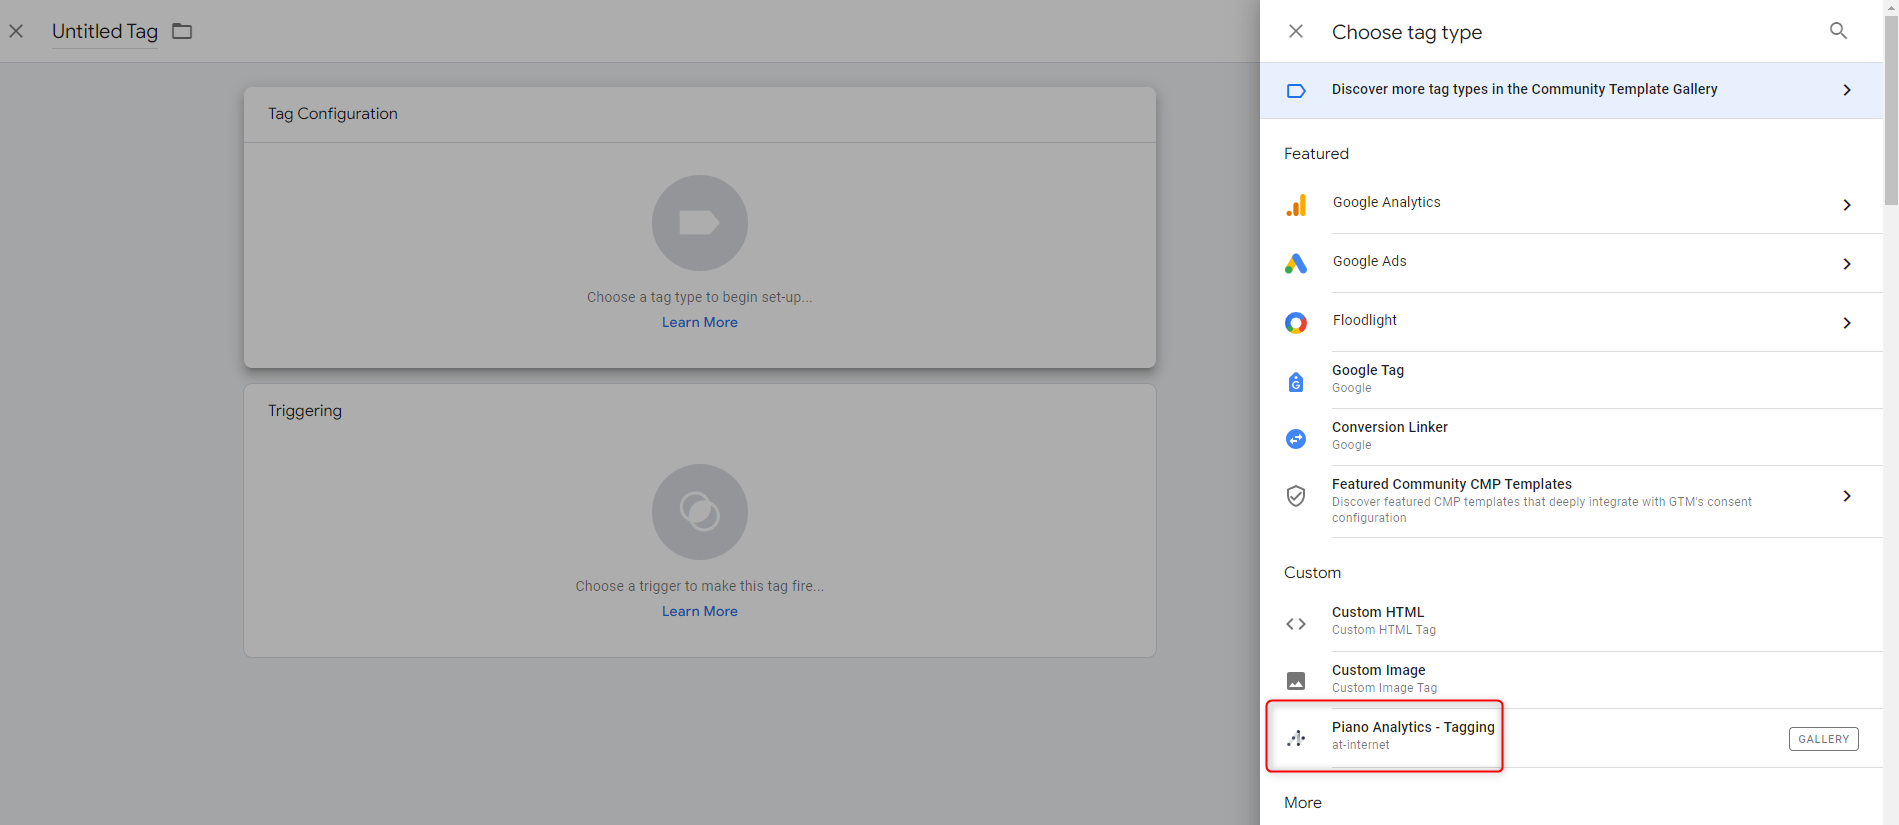
Go to the Templates tab on the GTM interface, and click on Search Gallery from the Tag Templates section. Then search for the template Piano Analytics
- Tagging:
Variable Templates
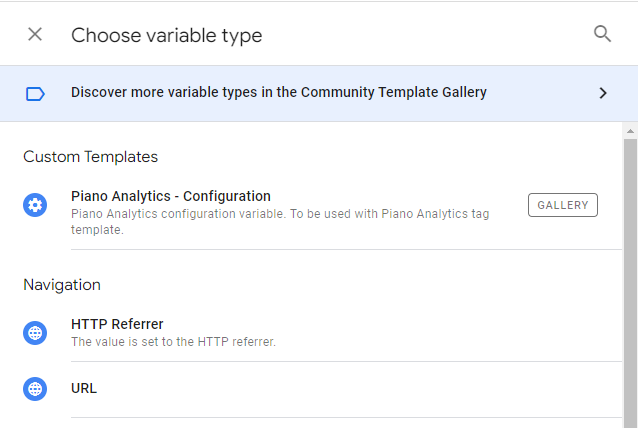
Stay in the Templates tab and click on Search Gallery from the Variable Templates section, to find the Piano Analytics - Configuration template:
Fill your collection endpoint, site number, PA SDK source (up to date CDN file by default) and choose the default consent mode. :
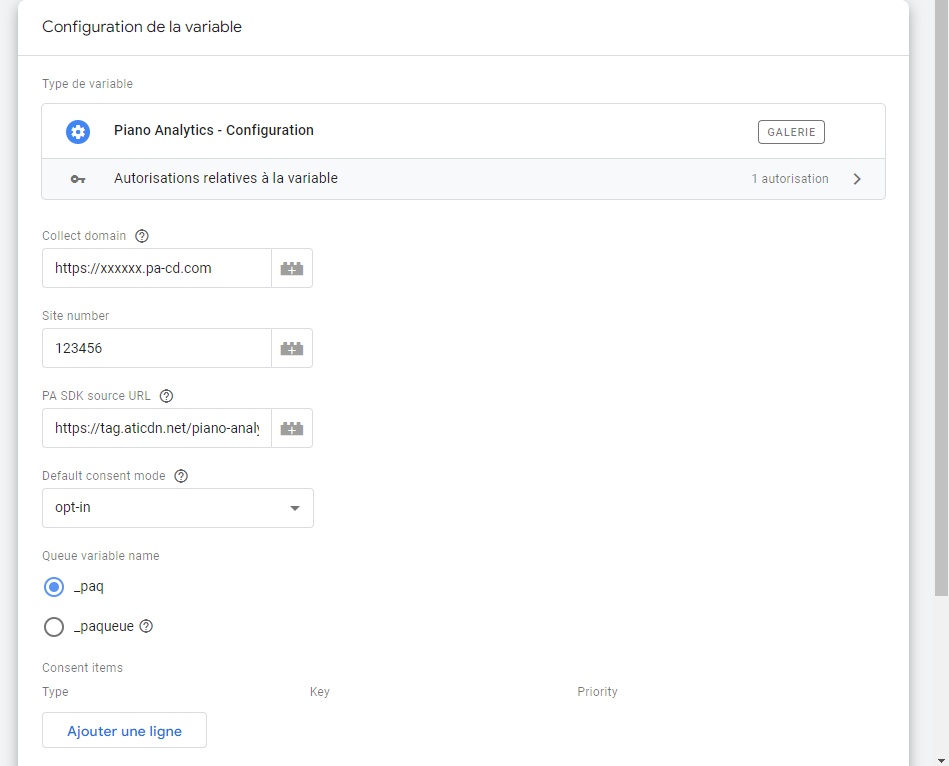
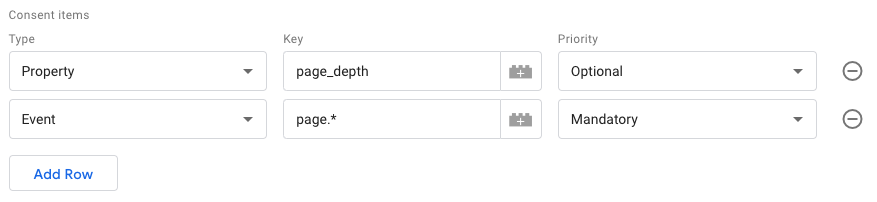
You can configure your Consent settings (documentation):
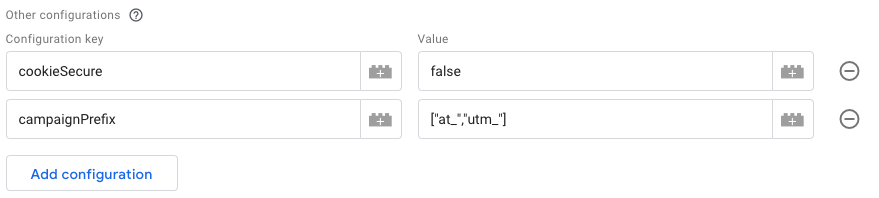
You can also add any other configuration available with our JS SDK (documentation):
Reminder : You can retrieve your collection information on the Data Collection Portal > Tagging > Collection Domains Piano Analytics interface.
Tag Settings
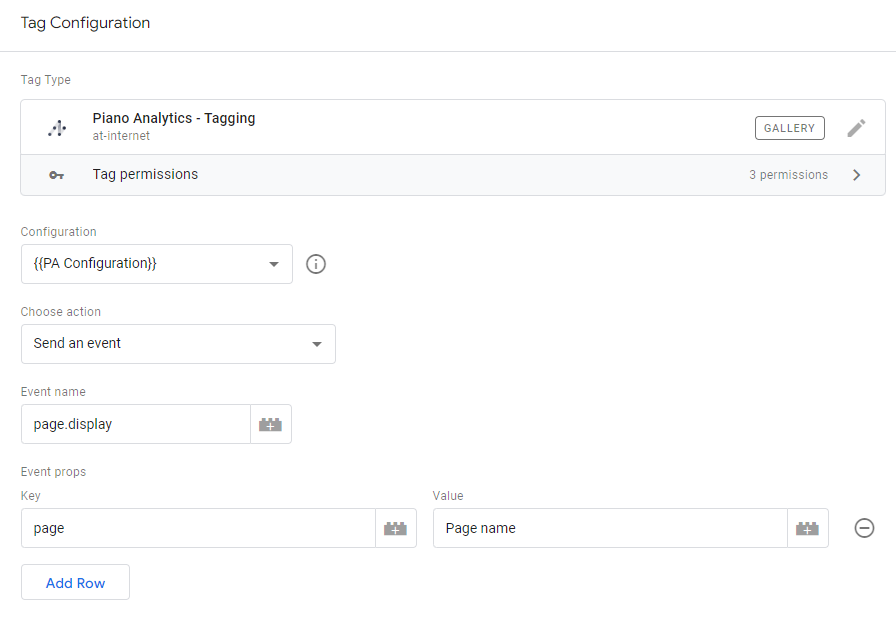
To manage your events, go to the Tags tab, and create a new tag with the previously customized Piano Analytics - Tagging template:
Make sure you use the previously created Variable as the Configuration for the Tag.
Events
You can now choose the action you need this tag to achieve (events documentation). Fill the Event name and all the properties needed:
To send multiple events, you need for each event name to associate a variable with a property object to be sent:
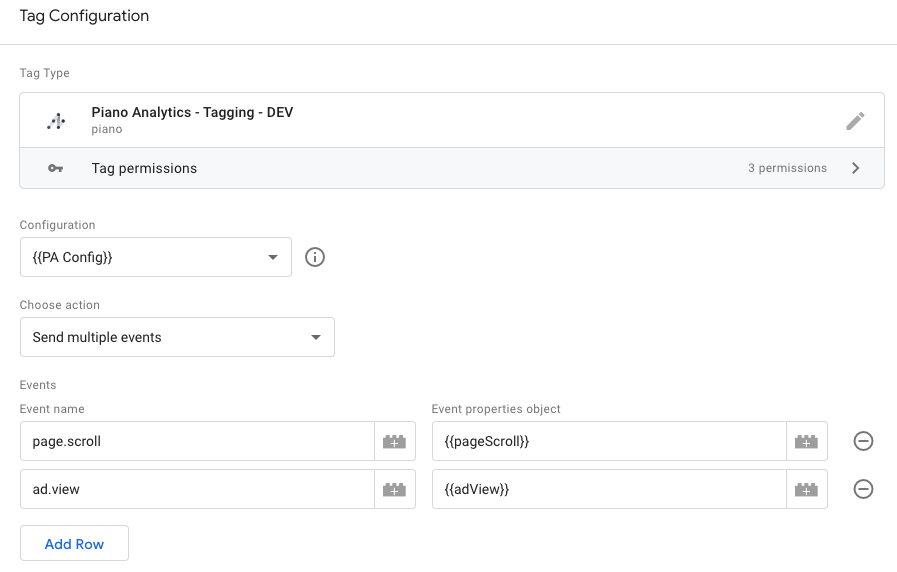
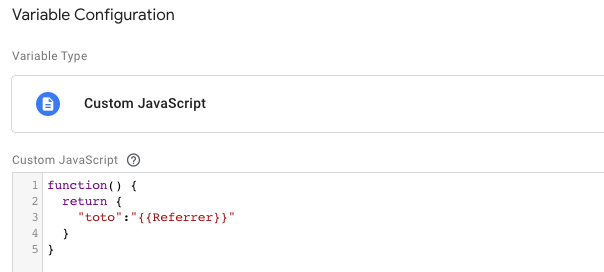
The event properties object can either be a JS Variable, or a custom JS Variable:
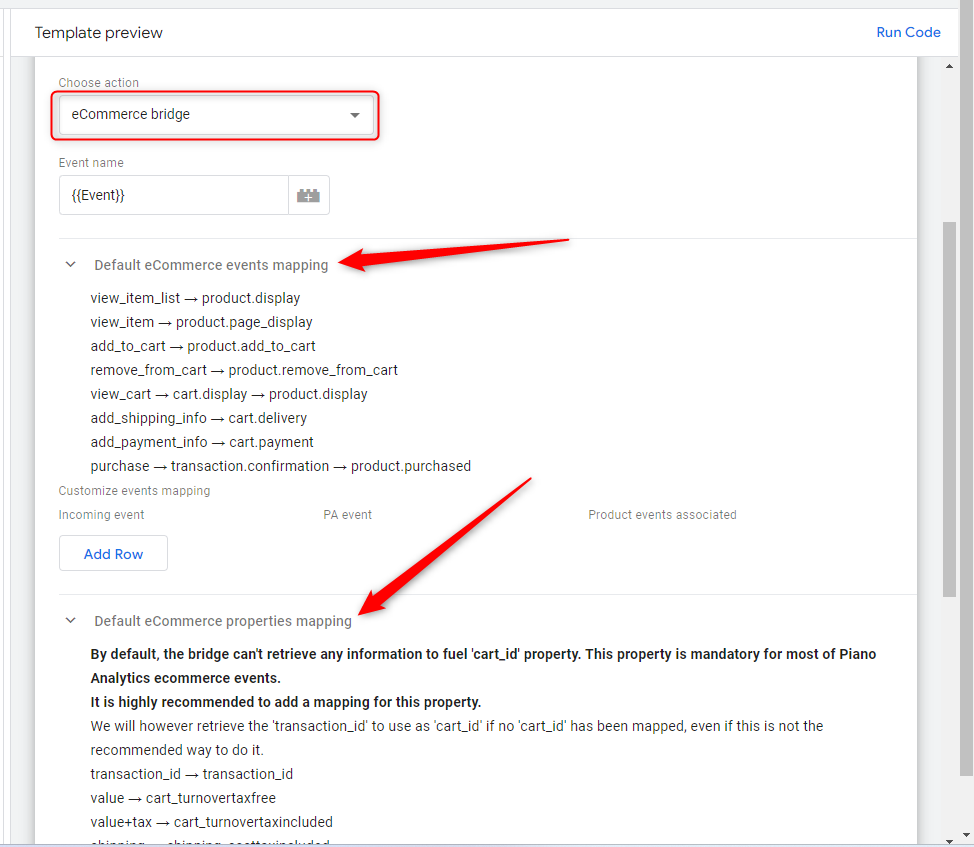
eCommerce Bridge
The template offers a native GA eCommerce bridge, that will automatically transform GA eCommerce tagging to Piano Analytics events and properties (documentation).
Default events mapping is displayed directly in the tag configuration:
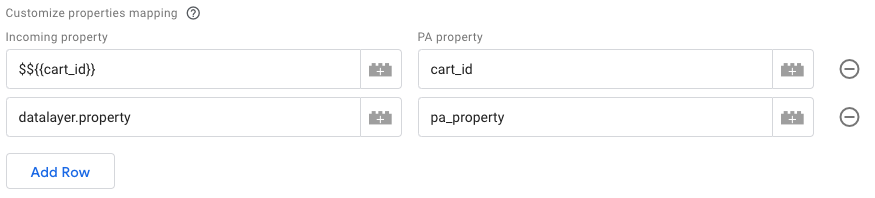
You can customize the properties mapping by adding new lines. Each line describes one mapping.
The first field expects the Datalayer property name. You can prefix the value with
$$to give a value instead of a property name.The second field expects the Piano Analytics property to fill with the output.
Set properties
You can set properties to subsequent events (documentation):
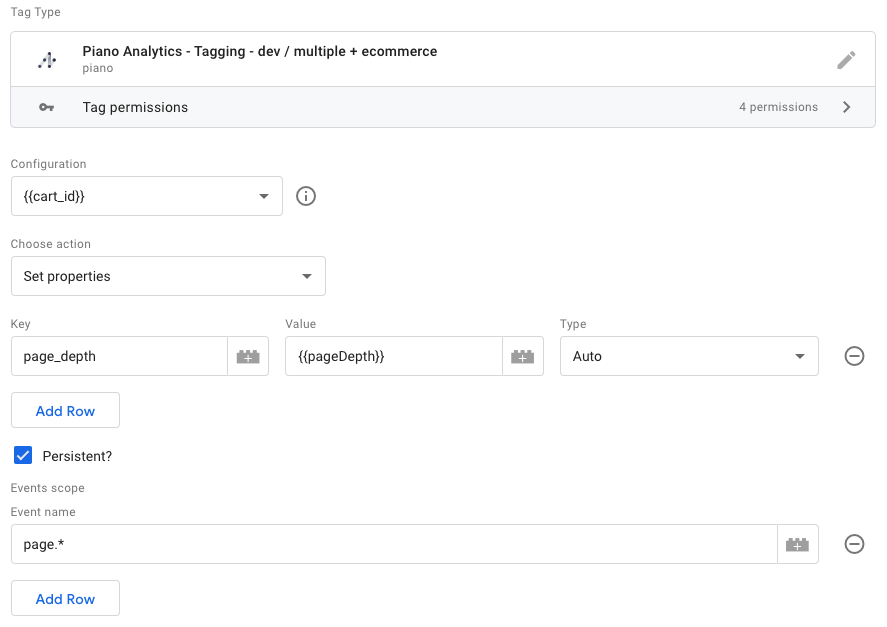
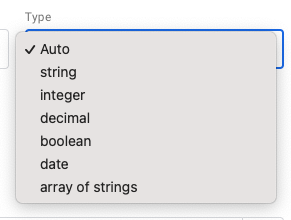
You can set the type of the property to either a fixed type, or to let the template automatically detect the type (using JSON.parse JS method):
Please note, however, that if you select a fixed type other than "Auto", your properties will be prefixed with this type (e.g. s:article for a string typed "article" property).
If this is your case, make sure you always keep this format, especially if you decide to exempt your prefixed properties.
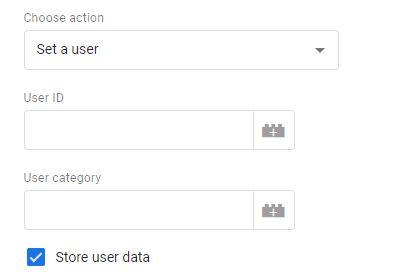
Set a user
You can use this action to identify a logged-in user (documentation):
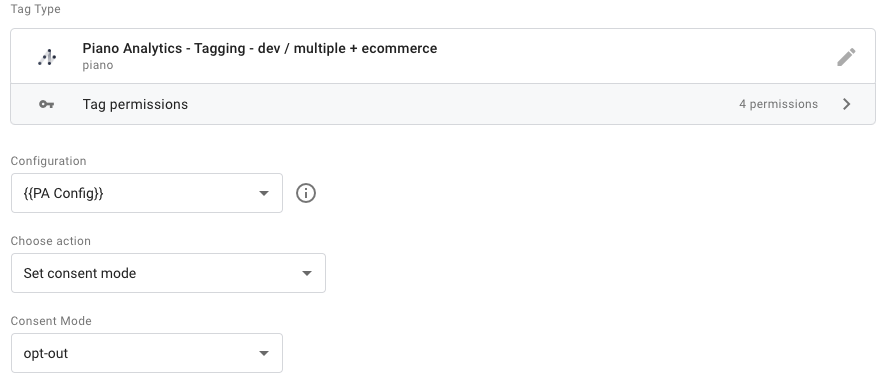
Set consent mode (PA SDK > 6.8)
You can set a new Consent mode if the end-user changes its preferences (documentation):
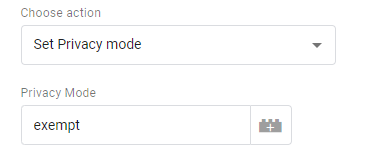
Set Privacy mode (PA SDK < 6.8)
You can set a new Privacy mode if the end-user changes its preferences (documentation):
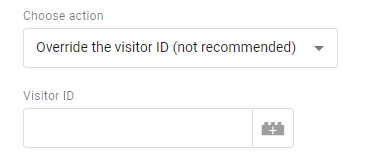
Override the Visitor ID (not recommended)
You can override our SDK management of the Visitor ID. This is however not recommended (documentation):